Key Requirements for Engineered Wood Flooring Installation in Residential Homes
How to Prepare for Engineered Wood Flooring Installation
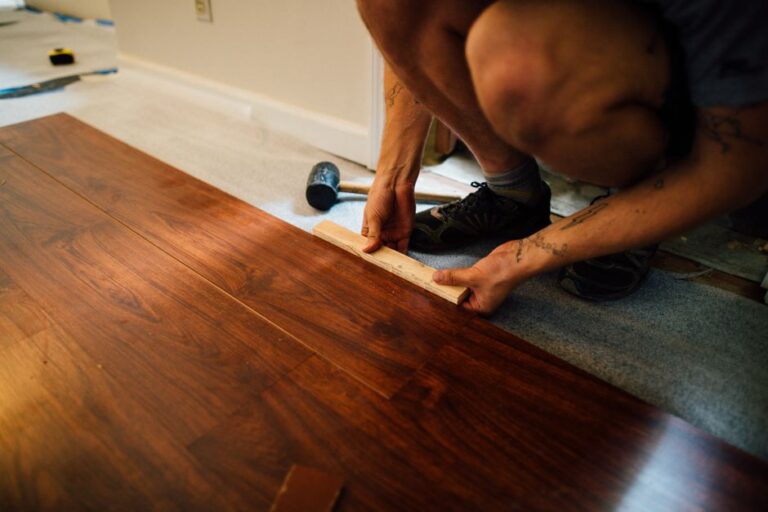
For engineered wood flooring installation, start by keeping the room at a steady temperature and humidity. Test the subfloor and planks for moisture, then make sure the subfloor is clean, sound, and flat. Choose an installation method approved for both the flooring and the subfloor. Before laying planks, plan staggered joints and leave expansion space along walls and other fixed surfaces.
In Chicago homes, seasonal weather shifts bring cold, dry winters and humid summers, making moisture checks especially important over basement concrete or historic subfloors. Following proper procedures for acclimation, vapor protection, and subfloor flatness protects the investment in your property and ensures the floor performs reliably year after year.

Jobsite and Moisture Preparation
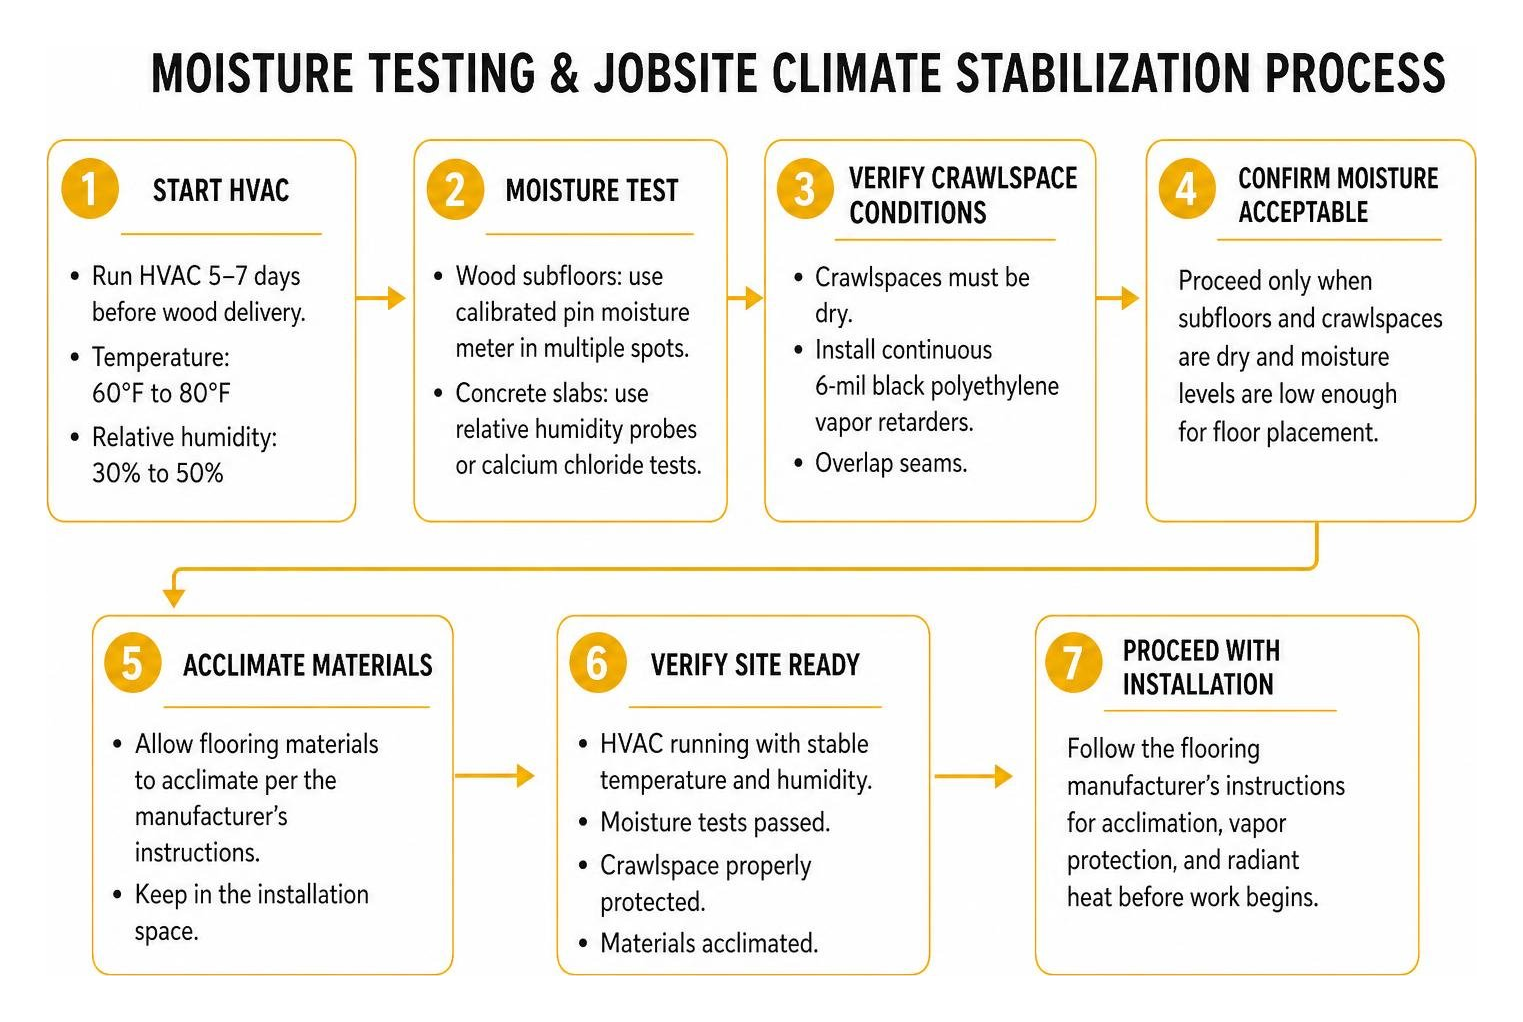
Preparing the jobsite correctly ensures that your new floor will not buckle, cup, or gap after it is installed. According to industry wood flooring installation guidelines, your home’s heating, ventilation, and air conditioning (HVAC) systems must be fully operational and running for at least 5 to 7 days before wood delivery. The living space should be kept between 60°F and 80°F, with indoor humidity maintained steadily within the range specified by the flooring manufacturer for the product being installed.
Moisture testing is mandatory before placing any boards. For wood subfloors, use a calibrated pin moisture meter across multiple spots in every room. For concrete slabs, relative humidity probes or calcium chloride tests determine whether moisture vapor emissions are low enough for floor placement. Crawlspaces beneath living areas must also be dry, equipped with continuous ground-covering 6-mil black polyethylene vapor retarders that overlap at the seams.
Subfloor Preparation for Engineered Wood Flooring Installation
The structural foundation beneath your boards dictates how solid and quiet the floor feels underfoot. Subfloors must be clean, structurally sound, and flat. For standard nailed or glued installations, subfloors must be flat within 3/16 inch over a 10-foot radius. Floating systems have even tighter requirements, needing a surface flat within 1/8 inch across 10 feet to keep click-lock joints from flexing and breaking.
High spots on wood framing must be sanded down, while high spots on concrete require mechanical grinding. Low areas should be filled using a high-strength, cementitious self-leveling underlayment compound. If you have a plywood or OSB subfloor over floor joists spaced 16 inches on center, the wood panels must be at least 5/8 inch thick. Joist spans up to 19.2 inches require a minimum subfloor panel thickness of 3/4 inch to prevent floor deflection and squeaks.
Radiant Heat Requirements and System Limits
Engineered wood can be installed over in-floor radiant heating systems, but the assembly must meet strict thermal rules. The heating elements should be fully embedded in concrete or gypcrete at least 1/2 inch below the surface. Before flooring delivery, the heating system must run for several days to drive out residual building moisture, then be reduced to a comfortable installation temperature.
The surface temperature of the subfloor must never exceed the maximum specified by the flooring manufacturer, typically in the low 80s Fahrenheit. To protect the wood from thermal shock, daily temperature adjustments must be gradual, changing no more than 5°F in any 24-hour cycle. In-floor temperature sensors and external thermostats are required to monitor heat output and prevent localized floor damage.
Methods for Engineered Wood Flooring Installation
Selecting the correct fastening technique depends on your subfloor type, plank dimensions, and whether the room sits above or below ground level.

The three primary installation styles provide different benefits:
| Installation Method | Subfloor Compatibility | Best Used For | Key Advantage |
|---|---|---|---|
| Direct Glue-Down | Cured concrete, plywood, OSB | Main levels, basements, wide planks | Maximum sound dampening and zero fastener squeaks |
| Floating Floor | Concrete, wood, existing flat floors | Below-grade areas, condos, over radiant heat | Fast assembly and independent floor movement |
| Nail / Staple-Down | Plywood, OSB (minimum 5/8″ thick) | Upper living levels, traditional framing | Strong mechanical connection with standard planks |
Glue-Down and Floating Engineered Wood Flooring Installation
Direct glue-down installation utilizes specialized moisture-cure urethane adhesives spread with a notched trowel across concrete or wood substrates. This method bonds the planks firmly to the foundation, creating a quiet, solid feel that eliminates hollow sounds. When remodeling main floors or finished basements, direct glue-down provides strong structural stability and prevents boards from shifting during seasonal humidity changes. We regularly handle complete subfloor prep and full-spread glue-down work as part of our residential flooring services.
Floating floor installations connect the planks along their edges using click-lock profiles or tongue-and-groove glue without adhering them directly to the subfloor. An approved underlayment—such as high-density foam or acoustic cork with an integrated vapor barrier—is rolled out first. Floating systems are common for below-grade concrete slabs because they decouple the wood from the slab and permit natural seasonal movement across larger rooms. Our team coordinates this method across diverse residential spaces when delivering tailored flooring installation solutions.
Mechanical Fastening and Glue-Assist Techniques
Nail-down and staple-down methods use pneumatic flooring tools to drive 18-gauge to 20-gauge cleats or narrow-crown staples at a 45-degree angle directly through the tongue of each board. Fasteners are spaced every 3 to 4 inches along the length of the plank, with a fastener placed 1 to 2 inches from each end joint.
When working with planks wider than 5 inches, mechanical fasteners alone cannot prevent cupping and board movement. Installers apply a serpentine bead of elastomeric wood flooring adhesive to the back of each wide board before blind-nailing it into the plywood subfloor. This glue-assist technique stops boards from rubbing against subfloor nails and silences unwanted floor squeaks.
Layout Planning, Cutting, and Expansion Requirements
Proper board layout protects the structural balance of the floor and ensures a balanced appearance across the entire room.

Common mistakes during installation can lead to long-term floor failure:
- Fastening planks without leaving an adequate perimeter expansion gap along walls and door thresholds.
- Lining up end joints too closely in adjacent rows, forming weak “H-joints” or stair-step visual patterns.
- Forgetting to undercut door casings and jambs, which pinches the floor and causes mid-room buckling.
- Pulling boards from a single box rather than blending planks from 4 to 5 cartons at once.
- Failing to verify that subfloor moisture falls within safe manufacturer tolerances before laying boards.
Staggering Planks and Managing Expansion Gaps
Plank end joints must be staggered by at least 6 to 8 inches in adjacent rows, with wider boards requiring offsets of 10 inches or more. Always snap chalk lines parallel to the longest unobstructed wall to keep the initial starter rows perfectly straight. Door casings and jambs must be undercut using an oscillating saw laid flush over a flooring scrap so planks can slide underneath freely.
Maintain a continuous expansion gap—typically equal to the plank thickness or a minimum of 1/2 inch—around all vertical obstructions, cabinets, and walls. Baseboards and shoe moldings are fastened exclusively to the drywall framing, never through the flooring planks, allowing the wood floor to expand and contract smoothly throughout changing weather. If your existing wood features surface wear, routine maintenance or professional hardwood floor refinishing can restore the wear layer over time.
Frequently Asked Questions About Engineered Hardwood
How long does engineered wood flooring need to acclimate before installation?
Engineered wood flooring typically requires 48 to 72 hours of on-site acclimation in the room where it will be installed. Cartons should be brought inside, laid flat, and cross-stacked with spacers to allow air circulation. The home’s HVAC system must maintain normal living conditions between 60°F and 80°F with relative humidity within the range specified by the flooring manufacturer throughout the acclimation window.
What is the acceptable moisture difference between subfloors and engineered wood?
For wood subfloors, the moisture content of the subfloor and the engineered wood planks should not differ by more than the tolerance stated by the flooring manufacturer for the specific product and plank width. The total moisture content of a wood subfloor must not exceed the manufacturer’s stated maximum. Concrete subfloors should read below the internal relative humidity limit specified by the flooring and adhesive manufacturers, or produce moisture vapor emissions below the level permitted by the installation guidelines for the chosen adhesive system.
Can engineered hardwood be installed in Chicago basements over concrete?
Yes, engineered hardwood is suitable for basement installations over concrete because its multi-ply core provides enhanced dimensional stability. However, the concrete slab must be cured, flat, and tested for moisture vapor emissions. Installers must use an approved direct-stick adhesive with an integrated vapor barrier or install a floating floor over a dedicated moisture-barrier underlayment membrane.
Conclusion
HQ Carpentry was founded in 2011 by Tomasz Pietrzyk. We are a licensed and insured, EPA Lead-Safe certified residential remodeling company serving homeowners in Chicago and the surrounding suburbs. We specialize in custom woodwork, condo renovations, kitchen makeovers, basement finishing, and complete flooring installations.
When you plan a home renovation, we assess your subfloors, verify jobsite moisture levels, and provide a fixed written quote following our initial review. All of our remodeling and carpentry work includes a 1-year workmanship warranty.
Call (773) 968-3606 or request a free in-home estimate at hqremodelingchicago.com/contact/. We come to your home.
Ready to start your remodel?
Tell us about your project and we'll follow up with next steps.
Free Quote